Writing your C++23 Code
You must already have VS Code installed, or be using a CSIL machine. If not, please see the guides.
Configure VS Code and Compiler (done once)
- If needed, in the Explorer view on the left, create a new folder for your activity (such as
lab1orasn2; don't put spaces in these names).- In the Explorer pane on the left, select the "Create Folder" button at the top.
- Name the folder based on what you are working on, such as
lab1, orlecture_week_2 - Creating folders for your work helps organize all your files; don't put spaces in the filename
- Open/Create file:
- Right-click on your
lab1folder (or whatever name you gave it) and select "New File" - Name the file as needed, such as
hello.cpp. - Click on the file you created to open it.
- Right-click on your
-
Type in your C++ code into your file:
CPP#include <print> using namespace std; int main() { println("Hello world!"); } - Configure VS Code to use C++23
- In VS Code's menu, goto File > Preferences > Settings.
- Search for
standard - You should see the option: C_Cpp › Default: Cpp Standard.
- Set this to be
c++23 - Click the X to close the preferences window.
- Select correct C++ compiler
- Ensure you are viewing
hello.cpp. - From the menu, select Run > Run Without Debugger.
- In the box at the top, select the option for "g++-14".

- Notice that this will have created the file
.vscode\tasks.json. - It is likely that compiling failed; we'll fix that in the next step.
- Ensure you are viewing
- Configure C++ Compiler to use C++23
- Open
.vscode/tasks.jsoncreated automatically by the previous step. - Ensure that the "command" line uses
g++-14:
"command": "/usr/bin/g++-14", - Add the following as a new line just below
"args": ["list, add:
"-std=c++23", - Full
.vscode/tasks.jsonmay look like:YAML{ "tasks": [ { "type": "cppbuild", "label": "C/C++: g++-14 build active file", "command": "/usr/bin/g++-14", "args": [ "-fdiagnostics-color=always", "-g", "${file}", "-o", "${fileDirname}/${fileBasenameNoExtension}" ], "options": { "cwd": "${fileDirname}" }, "problemMatcher": [ "$gcc" ], "group": { "kind": "build", "isDefault": true }, "detail": "Task generated by Debugger." } ], "version": "2.0.0" }
- Open
- Reopen the
hello.cppfile.- It may still show an error with
printlnbecause the previous attempt to compile the file failed. That's OK. We'll fix it next.
- It may still show an error with
- In the top-right of the .cpp file, click the play button.
- Button may show a bug icon on a play button. OK to click the button, or click the drop-down and select "Debug C/C++ File".
- It should open a new terminal (or two) and show you the output of your program.
- If asked to "Select a debug configuration", select the "C/C++: g++-14..." option.
- You may need to switch to the "Terminal" tab:
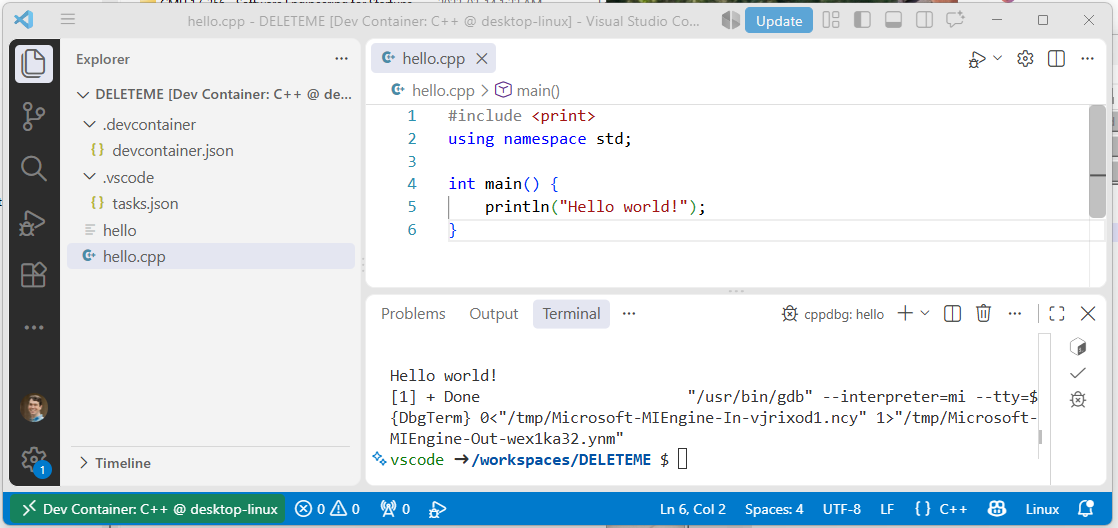
- Rather than clicking the button each time, I suggest using CTRL-F5 (or Command-F5?) to run your program faster!
Note
Code compiled on one machine, or inside a Dev Container will likely not run on on another computer or outside your dev container. This is not a problem! Your C++ code (in the .cpp file) is all we need!
Coding Next Time
The next time you open VS Code, you won't need to set any preferences or edit tasks.json: just create a new .cpp file and select to run it!
Coding Troubleshooting
- Ensure you have your .cpp file open and are clicked into it before trying to build or run the file. For example, trying to build and run a .json file will fail.
- 'println' is underlined, VS Code says "identifier 'println' is undefined" even before compiling it.
- See directions above for configure VS Code to use C++23: setting preferences for c++23.
- 'println' is underlined, VS code says "'println' was not declared in this scope (gcc)".
.vscode/tasks.jsonis likely missing the arg:"-std=c++23",- See directions above for
tasks.json
- If you don't see the play button to run your code:
- Ensure you have C++ IntelliSense addon installed in VS Code under WSL
- Ensure you have your .cpp file open.
- Ensure your file's name ends with .cpp.
- Right-click on the "..." in the top right of pane showing your .cpp code and ensure there is a check-mark beside "Run or Debug..."
- Ensure you are running WSL2
- Ensure you have installed g++ and gdb into WSL
- If you still don't see the play button, try installing the "Code Runner" extension. It has worked for some students.
- If you are having trouble with configuration:
- Ensure that you initially opened your
cmpt130folder, and not a sub-folder likelabsor.devcontainer. - Try deleting the .vscode folder and repeating configuration steps. Ensure you are selecting the
g++option, instead of thegccoption; and selectg++-14when possible.
- Ensure that you initially opened your